利用Tiny Tiny RSS+fever+reeder打造属于自己的RSS订阅全流程
虽然RSS订阅这种阅读方式已经没落了,但是这个世界上还是有那么一群人在坚持着。今天就来说下如何打造自己的RSS订阅流程。
目前有许多网站,比如豆瓣、知乎他们都关闭了RSS订阅,原因么,当然是因为RSS会减少他们的流量,为了解决这个问题,RssHub应运而生,搭建完成之后,需要一个RSS订阅的终端,这就多了,不过最近Reeder 4限免,就趁机入手了,Mac、ios全平台,不过Reeder有个缺点,就是订阅源不能同步,这就很伤了,所以这时,就需要ttrss来拯救了,通过ttrss+fever的组合,我们可以很容易的使用Reeder进行多终端同步。
1 搭建RssHub
安装 Git
sudo apt-get install git
安装Node.JS
安装 NodeJS 的最佳方式是使用 nvm。
安装 nvm,并向shell中添加nvm命令:
curl -o- https://raw.githubusercontent.com/creationix/nvm/v0.33.11/install.sh | bash
export NVM_DIR="$HOME/.nvm"
[ -s "$NVM_DIR/nvm.sh" ] && \. "$NVM_DIR/nvm.sh"
重启终端并执行下列命令即可安装 Node.js:
nvm install node
安装 RSSHub
git clone https://gitee.com/fork-project/RSSHub.git
cd RSSHub
npm install
绑定域名
到目前为止,我们已经可以通过ip进行订阅了,但是每次都用IP也太麻烦了。
首先安装宝塔,然后打开软件商店—运行环境—PM2管理器,然后:

添加完成之后,点击映射,填写域名。然后去阿里云进行域名解析即可。
安装Rsshub,在npm install这一步报错:
npm WARN deprecated urix@0.1.0: Please see https://github.com/lydell/urix#deprecated
npm WARN deprecated resolve-url@0.2.1: https://github.com/lydell/resolve-url#deprecated
npm ERR! code ENOENT
npm ERR! syscall spawn git
npm ERR! path git
npm ERR! errno -2
npm ERR! enoent Error while executing:
npm ERR! enoent undefined ls-remote -h -t ssh://git@github.com/postlight/browser-request.git
npm ERR! enoent
npm ERR! enoent
npm ERR! enoent spawn git ENOENT
npm ERR! enoent This is related to npm not being able to find a file.
npm ERR! enoent

npm ERR! A complete log of this run can be found in:
npm ERR!     /root/.npm/_logs/2020-07-20T05_43_51_809Z-debug.log
解决方法:
npm i --save module-alias
npm install dotenv
npm install https-proxy-agent
2 Docker安装
docker pull diygod/rsshub
sudo yum update
docker run -d --name rsshub -p 1200:1200 diygod/rsshub
然后打开宝塔,正常新建站点,然后打开反向代理:
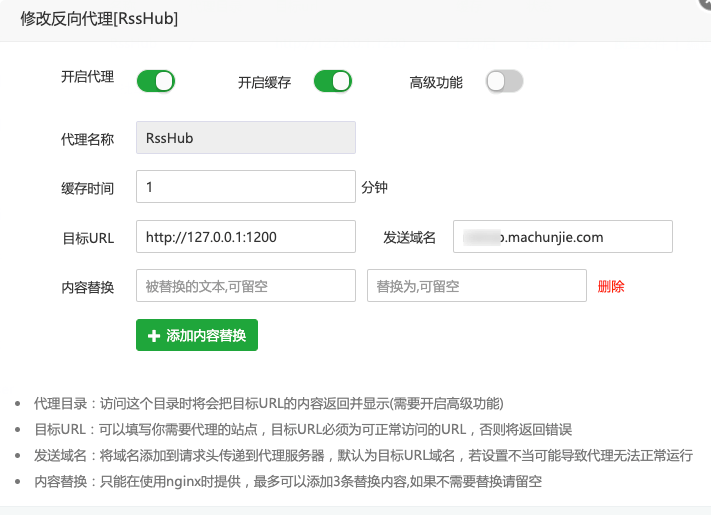
然后填写SSL证书,完成。

2 安装Tiny Tiny RSS服务
安装ttrss也有两种比较常见的方案,一种是docker,一种是通过源码。这里,我们采用源码的方式。
首先,利用宝塔新建一个站点:xxx.machunjie.com,然后配置PHP为7.4(只要大于5.5就行,7.x性能更好),打开PHP的fileinfo,然后打开终端:
git clone https://tt-rss.org/git/tt-rss.git
如果下载慢,我这里有打包好的,直接去下载即可。天翼云下载链接
下载完成之后,将里面的内容移动到xxx.zqy.pub目录下,注意把之前的里面的文件删掉。
在宝塔中配置SSL,打开强制HTTPS。完成之后,打开xxx.zqy.pub/install,开始安装:
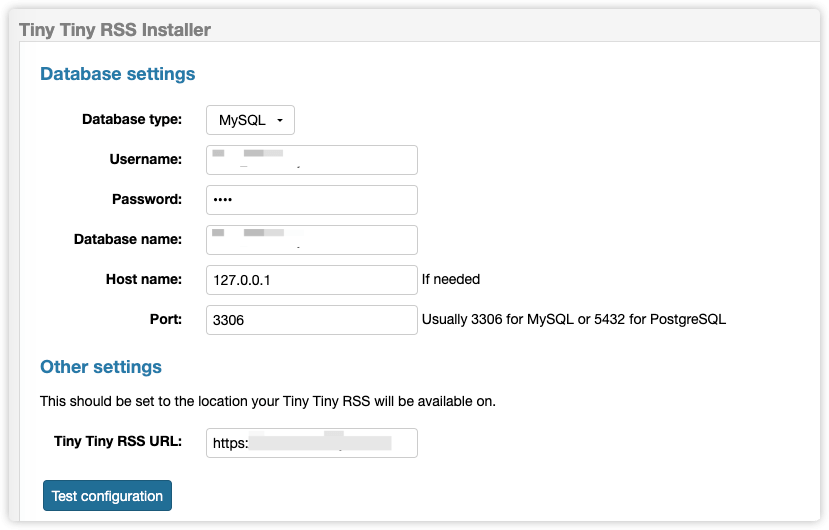
测试配置之后,初始化数据库:
<?php
	// *******************************************
	// *** Database configuration (important!) ***
	// *******************************************

	define('DB_TYPE', 'mysql'); // pgsql or mysql
	define('DB_HOST', '127.0.0.1');
	define('DB_USER', 'xxx_machunjie');
	define('DB_NAME', 'xxx_machunjie');
	define('DB_PASS', 'xxx');
	define('DB_PORT', '3306'); // usually 5432 for PostgreSQL, 3306 for MySQL

	define('MYSQL_CHARSET', 'UTF8');
	// Connection charset for MySQL. If you have a legacy database and/or experience
	// garbage unicode characters with this option, try setting it to a blank string.

	// ***********************************
	// *** Basic settings (important!) ***
	// ***********************************

	define('SELF_URL_PATH', 'https://ttrss.machunjie.com/');
	// This should be set to a fully qualified URL used to access
	// your tt-rss instance over the net, such as: https://example.org/tt-rss/
	// The value should be a constant string literal. Please don't use
	// PHP server variables here - you might introduce security
	// issues on your install and cause hard to debug problems.
	// If your tt-rss instance is behind a reverse proxy, use the external URL.

	define('SINGLE_USER_MODE', false);
	// Operate in single user mode, disables all functionality related to
	// multiple users and authentication. Enabling this assumes you have
	// your tt-rss directory protected by other means (e.g. http auth).

	define('SIMPLE_UPDATE_MODE', false);
	// Enables fallback update mode where tt-rss tries to update feeds in
	// background while tt-rss is open in your browser.
	// If you don't have a lot of feeds and don't want to or can't run
	// background processes while not running tt-rss, this method is generally
	// viable to keep your feeds up to date.
	// Still, there are more robust (and recommended) updating methods
	// available, you can read about them here: http://tt-rss.org/wiki/UpdatingFeeds

	// *****************************
	// *** Files and directories ***
	// *****************************

	define('PHP_EXECUTABLE', '/usr/bin/php');
	// Path to PHP *COMMAND LINE* executable, used for various command-line tt-rss
	// programs and update daemon. Do not try to use CGI binary here, it won't work.
	// If you see HTTP headers being displayed while running tt-rss scripts,
	// then most probably you are using the CGI binary. If you are unsure what to
	// put in here, ask your hosting provider.

	define('LOCK_DIRECTORY', 'lock');
	// Directory for lockfiles, must be writable to the user you run
	// daemon process or cronjobs under.

	define('CACHE_DIR', 'cache');
	// Local cache directory for RSS feed content.

	define('ICONS_DIR', "feed-icons");
	define('ICONS_URL', "feed-icons");
	// Local and URL path to the directory, where feed favicons are stored.
	// Unless you really know what you're doing, please keep those relative
	// to tt-rss main directory.

	// **********************
	// *** Authentication ***
	// **********************

	// Please see PLUGINS below to configure various authentication modules.

	define('AUTH_AUTO_CREATE', true);
	// Allow authentication modules to auto-create users in tt-rss internal
	// database when authenticated successfully.

	define('AUTH_AUTO_LOGIN', true);
	// Automatically login user on remote or other kind of externally supplied
	// authentication, otherwise redirect to login form as normal.
	// If set to true, users won't be able to set application language
	// and settings profile.

	// *********************
	// *** Feed settings ***
	// *********************

	define('FORCE_ARTICLE_PURGE', 0);
	// When this option is not 0, users ability to control feed purging
	// intervals is disabled and all articles (which are not starred)
	// older than this amount of days are purged.

	// ****************************
	// *** Sphinx search plugin ***
	// ****************************

	define('SPHINX_SERVER', 'localhost:9312');
	// Hostname:port combination for the Sphinx server.

	define('SPHINX_INDEX', 'ttrss, delta');
	// Index name in Sphinx configuration. You can specify multiple indexes
	// as a comma-separated string.
	// Example configuration files are available on tt-rss wiki.

	// ***********************************
	// *** Self-registrations by users ***
	// ***********************************

	define('ENABLE_REGISTRATION', false);
	// Allow users to register themselves. Please be aware that allowing
	// random people to access your tt-rss installation is a security risk
	// and potentially might lead to data loss or server exploit. Disabled
	// by default.

	define('REG_NOTIFY_ADDRESS', 'user@your.domain.dom');
	// Email address to send new user notifications to.

	define('REG_MAX_USERS', 10);
	// Maximum amount of users which will be allowed to register on this
	// system. 0 - no limit.

	// **********************************
	// *** Cookies and login sessions ***
	// **********************************

	define('SESSION_COOKIE_LIFETIME', 86400);
	// Default lifetime of a session (e.g. login) cookie. In seconds,
	// 0 means cookie will be deleted when browser closes.

	// *********************************
	// *** Email and digest settings ***
	// *********************************

	// Tiny Tiny RSS sends mail via PHP mail() function, unless handled
	// by a plugin.

	// If you need SMTP support, take a look here:
	// https://git.tt-rss.org/fox/ttrss-mailer-smtp

	define('SMTP_FROM_NAME', 'Tiny Tiny RSS');
	define('SMTP_FROM_ADDRESS', 'noreply@your.domain.dom');
	// Name, address and subject for sending outgoing mail. This applies
	// to password reset notifications, digest emails and any other mail.

	define('DIGEST_SUBJECT', '[tt-rss] New headlines for last 24 hours');
	// Subject line for email digests

	// ***************************************
	// *** Other settings (less important) ***
	// ***************************************

	define('CHECK_FOR_UPDATES', true);
	// Check for updates automatically if running Git version

	define('ENABLE_GZIP_OUTPUT', false);
	// Selectively gzip output to improve wire performance. This requires
	// PHP Zlib extension on the server.
	// Enabling this can break tt-rss in several httpd/php configurations,
	// if you experience weird errors and tt-rss failing to start, blank pages
	// after login, or content encoding errors, disable it.

	define('PLUGINS', 'auth_internal, note');
	// Comma-separated list of plugins to load automatically for all users.
	// System plugins have to be specified here. Please enable at least one
	// authentication plugin here (auth_*).
	// Users may enable other user plugins from Preferences/Plugins but may not
	// disable plugins specified in this list.
	// Disabling auth_internal in this list would automatically disable
	// reset password link on the login form.

	define('LOG_DESTINATION', 'sql');
	// Error log destination to use. Possible values: sql (uses internal logging
	// you can read in Preferences -> System), syslog - logs to system log.
	// Setting this to blank uses PHP logging (usually to http server
	// error.log).
	// Note that feed updating daemons don't use this logging facility
	// for normal output.

	define('CONFIG_VERSION', 26);
	// Expected config version. Please update this option in config.php
	// if necessary (after migrating all new options from this file).

	// vim:ft=php
然后保存配置文件,再次打开xxx.zqy.pub,会发现出现了登陆窗口,账号:admin,密码:password,登陆之后,会让我们改密码,然后出现以下界面:
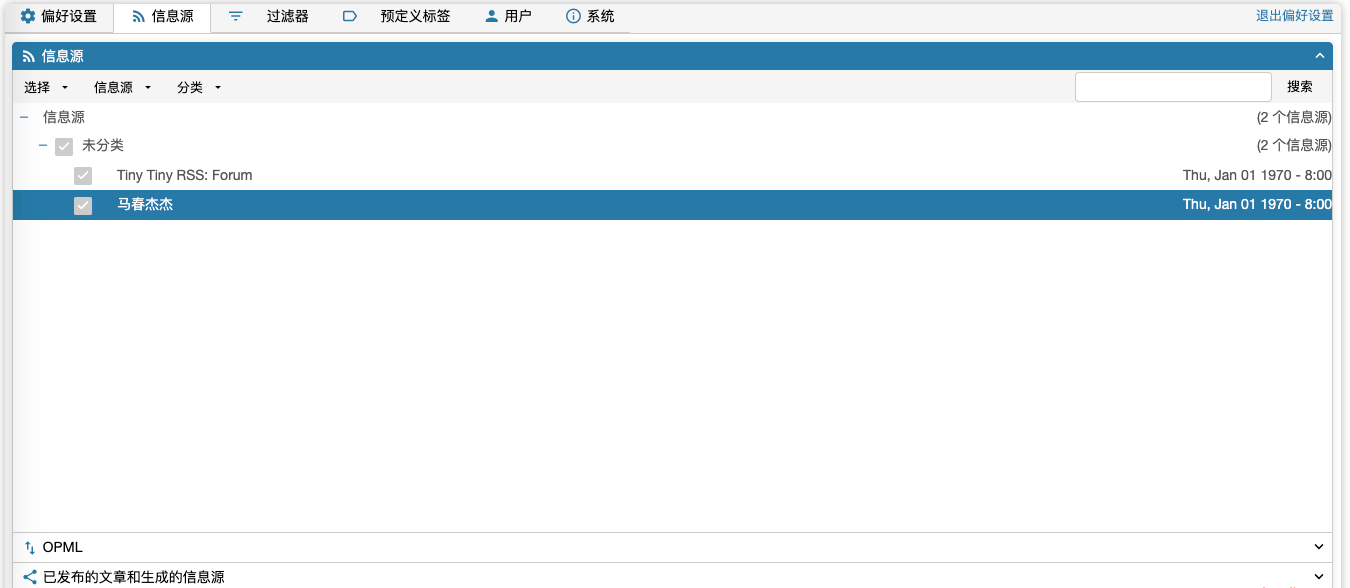
到这里,其实ttrss已经装好了,不过还需要一些小设置。
顺便把启用API打开。
2.2 打开自动更新
默认安装的ttrss是不进行自动更新的,想要自动更新,官网给了两种方案,分别是crontab和前台自动更新。首先说一下第二种,比较简单,打开根目录的config.php,然后搜索SIMPLE_UPDATE_MODE,将其设为true即可。
下面详细说一下第一种,使用crontab方式。
首先:crontab -u www -e,然后加入:
*/10 * * * * /www/server/php/74/bin/php /www/wwwroot/xxx.machunjie.com/update.php --feeds --quiet
OK,这样就可以自动刷新了。接下来安装fever插件。
3 fever插件
打开终端:
git clone https://github.com/DigitalDJ/tinytinyrss-fever-plugin fever
将其移至plugins.local文件夹中,然后打开偏好设置--用户插件--fever,打开,然后刷新,会看到下面有一行Fever Emulation选项,注意下面的红框部分:

到这一步,我们已经是完成了fever的配置了,接下来就是打开Reeder 4,然后添加fever服务:
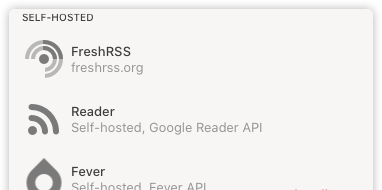
选择之后的server填上面的红框中的地址,用户名为admin,密码为上面设置的密码。完成!
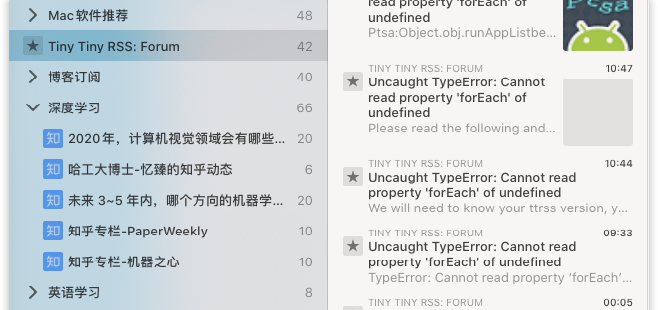
这时,就可以在多个终端愉快的阅读RSS了。

网友评论